
Gems are a great way to extend the functionality of your program. One gem that we are going to look at today is the “Devise” gem. If you have an application that will have users that will be able to log into your application there has to be a way to authenticate that user. You need to make sure that the username and the password match.
Here is how you use Devise in your Rails application.
- Go to your Gemfile and write: gem ‘Devise’
- Then in your command line type in: bundle install
- Then type in the terminal: rails generate devise:install
- In your terminal there should have appeared a list of steps that you will now have to do in your applications files:

- In your “environment” folder there is a “development.rb” file you have will have to paste the following line to the bottom of your file, but before the keyword “end”:
config.action_mailer.default_url_options = { :host => 'localhost:3000' }Also notice that in your “environment” folder there are two other files. These files are for different stages of your app. One will be for development, one for production and one for testing.
- At the bottom of you “production.rb” file you will have to paste in the following:
config.action_mailer.default_url_options = { :host => 'yourappsname.com' } - Next you are going to have to define the root URL. Go to your “config” folder then in the “routes.rb” file. At the top of the file type the following:
root "pages#home"
- Now we are going to have to set up our flash messages which will appear on the screen when our users either login successful or login incorrectly. In your “views” folder then in your “application.html.erb” file type the following:
<% flash.each do |name, msg| %>
<%= content_tag(:div, msg, class: "alert alert-info") %>
<% end %>
- Go to your “application.rb” file and inside your mode as the very last line type in the following:
config.assets.initialize_on_precompile = false
This is going to be required later on when we push to Heroku.
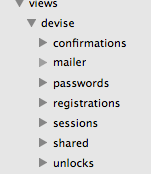
- In the terminal enter in the following line: rails generate devise:views
- The above is going to create a lot of different folders and files for you which you will be able to see when you open the application in your text editor.
- In your “environment” folder there is a “development.rb” file you have will have to paste the following line to the bottom of your file, but before the keyword “end”:
In the next post I will show you how to start setting up users using Devise!
Resources:
1. Treehouse Blog: 10 Must Have Gems
